This blog documents the modifications necessary to get seaworthy (warts and all), then the adventures (hopefully) on board our Trailer Sailer 6.1 metre Jarcat6 Catamaran, Kismet.

Thursday 14 December 2017

Stainless Steel Screws for Christmas

To keep the transom reinforcing project going over Christmas I have ordered (from Bolts Nuts Screws Online):

Product Price Qty Subtotal
316 STS CSK PHIL: #10 X 3.1/2 0.85 10 8.50
316 STS CSK PHIL: #10 X 3 0.73 10 7.30
316 STS PAN PHIL: #10 X 1/2 0.14 10 1.40
316 STS CSK PHIL: #12 X 1/2 0.22 10 2.20
316 STS PAN PHIL: #12 X 5/8 0.20 10 2.00

Essentially it's enough stainless steel screws to hold the rear traveller down into every layer of timber on the transom - regardless.

The 'I' section traveller (for the main sheet) on the transom is Ronstan I-Beam 19 and is 24mm high.
There is a 7mm gap to the  top piece of timber of the transom.
The top piece of timber is anywhere from 35mm to 25mm high (35mm in the middle - the highest load point).
The lower section of the transom is about 40mm high.

So 24+7+35 = 66mm
To make the screw "bite" all the way to the lower part of the transom my 3 1/2" (or 88mm) screws will give around 22mm of penetration.
I'll use the 76mm screws as the top timber gets thinner.
All screws will be epoxied in. If I ever have to remove it - well I'll cross that bridge...

By the way. The existing screws are 50mm long - losing 30mm before they hit timber. The two I tried this morning are modestly thumb and forefinger tight with traces of silicone on the threads -  and NO NYLON INSERTS. It's stainless steel on aluminium. (There are nylon inserts on the Jib sheets travellers - I have found several sources of them online.)

My next challenge is where to get 7mm deep hardwood about 35-30mm wide.
Hopefully I'll get to that over the Christmas new year break. I've found a couple of timber machinists and custom molding places reasonably nearby. (I only have a manual power plane and I'd have to take 10mm down to 7mm evenly for a couple of meters - not likely - but possible.)

The #12 screws are for the rudder box lower gudgeons where you can't use bolts. (They were 6g countersunk with flat washers and were almost useless).
12g screws are 5.5mm to the outer part of the thread so should hold a lot better.
I got Countersunk (CSK) and Panhead (PAN) just in case one works better than the other. The 5/8" might just fit with a flat washer under them. The rudder box timber is 12mm, the gudgeon 2mm so I'd have to take up another 1.9mm to stop the screw poking through. If if doesn't look right I'll use the 1/2" (I'll check before screwing the 5/8" in).

Sunday 10 December 2017

Rear Traveller support

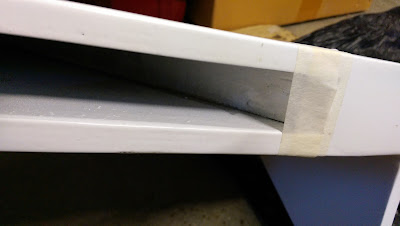
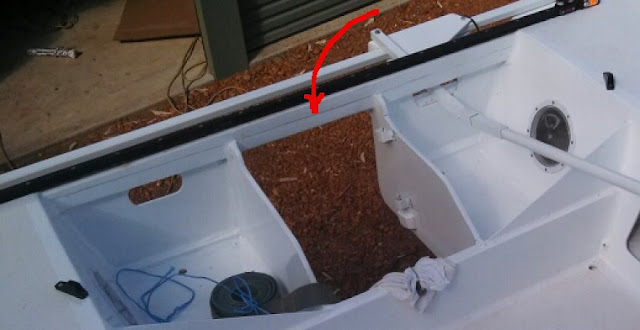
The main traveller is not supported for the entire transom width. It's screwed down hard at each end for about 150mm but has a 6mm gap to the top of the transom for most of its length.
You can see the gap in this picture.

The traveller is pulled down to reduce the gap to about 4mm in the middle. The gap near the ends is about 7mm.
There has been some attempt to use plastic spacers on the screws but at least one doesn't have anything.

My plan is to get some 6mm thick hardwood, seal it, then epoxy it to the top of the transom. The existing screws appear to be long enough and they will be epoxied in and will be the main strength for holding the traveller down.

Should I just use a bedding compound or epoxy the "filler" to the transom?
I doubt the screws will hold into the hardwood filler very well anyway.

Alternatively I have spotted a 6mm thick PVC section that I could use instead of timber but since epoxy won't hold it hardly at all it would indeed be just a filler piece.

What is also a little disturbing (what isn't about this boat?) is that the transom appears to have been made incorrectly then repaired. Note the 40mm deep top of the transom where it has been attached to the transom below it. How well is it secured? I don't know! If that 40mm (odd) deep section was 7mm thicker there would not have been an issue!

I'm tempted at at least add two full length m5 bolts and nuts (if they'll fit, else m4 or 5/32") through the traveller and top-of-transom down to either side of (inside) the motor well. Maybe I can even add more than that.

I have also just found that I can buy 8g Stainless Steel screws up to 3 inches in length. Those sunk into epoxied holes would hold the whole lot together.

As always - comments welcome.

Rudder box Reduction & Trailer modification

I spent a couple of hours sanding down the rudder boxes at the position where I want to re-mount the gudgeons yesterday. I had to take about 2mm off the width of the boxes to allow the gudgeons to slide on reasonably easily. Once they were sanded back enough I applied two coats of thinned Bote-cote to the now-raw timber - allowing a day in between coats.

The rudder box below is precariously balanced here so as to allow the epoxy to settle into the gaps - see the reason below. I have also marked the gudgeons as to where they will be used as they vary in gap slightly.

I added some filler to the left-over Bote-cote and dribbled it into the un-sealed gaps in the rudder boxes. This apparently should have been fibre-glassed during assembly - but no...

I have sealed about half the gaps so far. It's a good use for left-over Bote-cote each time I mix up a batch.


On other matters - I have been gouging our driveway curb each time I take the boat on and off our property. (I think there is a similar gouge in Vicroads driveway.)
You can see an old and a new gouge here.

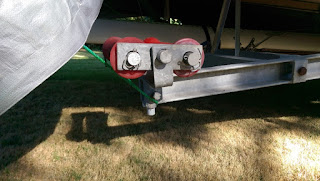
The rear double rollers on the trailer had not had the excess taken off the vertical bars so it left gouges every time the trailer went into a dip - like a driveway. It's not good for the trailer or boat when the trailer gets hung up on the curb either.  I'm REALLY hoping that I don't need the rollers to be adjusted up!

Rear right removed and cut down (with hacksaw - about 15 minutes each bar).

 Cut-down rear right.
I did the right hand side a couple of weeks ago but I could not get the left side off this morning (no matter how much cajoling I did with my hammer) so I took to it with the angle grinder and a cut-off wheel. I painted it in situ.
It was a lot quicker - but noisier and pretty fiery. I carefully figured the angle for the spark trail so as not to harm the boat. Sorry no pictures as no-one else was home.